Valid SSL Certificates for your Homelab with added ad-blocking goodness
A guide to getting valid SSL certificates for your homelab using Let's Encrypt's DNS-01 challenge and NGINX proxy manager.


It's been a while since I've had the time to write anything here, but recently decided to scratch an itch I had after watching a video on YouTube on Wolfgang's Channel which details setting up valid SSL certificates for your homelab using Let's Encrypt, NGINX Proxy Manager and a DNS provider that supports Let's Encrypt DNS-01 validation. For his video he used a free domain from DuckDNS but I had a spare domain registered through Cloudflare, and as Cloudflare supports DNS-01 validation I decided to just go with that.
Given I feel the same annoyance he does with the browser warning about invalid certificates, I figured I would give it a go - and at the same time replace an aging Raspberry Pi 3 running PiHole and consolidate it all into one homelab server.
In his video, Wolfgang details a docker compose file to get a few images up and running, so I figured I could simply add PiHole to the list - unfortunately not so simple as it turns out.
Here's a guide to what I did, and what hardware I used. There are probably simpler (or better) ways. But it worked well for me.
The Hardware
For this project I used an Intel NUC 11 Pro i7 NUC11PAHi7 that I picked up off eBay. For the OS I installed Proxmox. Pretty straightfoward process; download the image, flash a USB stick, boot it up and follow the instructions.
Once Proxmox was up and running, I downloaded the ISO for Ubuntu Server, uploaded it to Proxmox and then installed it as a VM. Once it was up and running I SSH'd into it and began the setup.
Docker
Firstly we had to install some dependencies.
sudo apt -y install apt-transport-https ca-certificates curl gnupg2 software-properties-common
Then before we can install Docker we have to install the Docker repository key.
sudo install -m 0755 -d /etc/apt/keyrings
curl -fsSL https://download.docker.com/linux/ubuntu/gpg | sudo gpg --dearmor -o /etc/apt/keyrings/docker.gpg
sudo chmod a+r /etc/apt/keyrings/docker.gpg
And then add the repository.
echo "deb [arch="$(dpkg --print-architecture)" signed-by=/etc/apt/keyrings/docker.gpg] https://download.docker.com/linux/ubuntu "$(. /etc/os-release && echo "$VERSION_CODENAME")" stable" | sudo tee /etc/apt/sources.list.d/docker.list > /dev/null
Now we can install Docker and Docker Compose.
sudo apt update
sudo apt-get install docker-ce docker-ce-cli containerd.io docker-buildx-plugin docker-compose-plugin docker-compose
If you are running as a standard non-root user, you need to add your user to the docker group.
sudo usermod -aG docker username
Reverse Proxy
We are going to use NGINX Proxy Manager to manage all of our internal domains and handle our SSL certificate.
To install it I used the following docker-compose.yml file to spin up proxy manager, nextcloud, home assistant and jellyfin:
version: '3.5'
services:
  nginxproxymanager:
    image: 'jc21/nginx-proxy-manager:latest'
    container_name: nginxproxymanager
    restart: unless-stopped
    ports:
      - '80:80'
      - '81:81'
      - '443:443'
    volumes:
      - ./nginx/data:/data
      - ./nginx/letsencrypt:/etc/letsencrypt

  nextcloud:
    image: lscr.io/linuxserver/nextcloud:latest
    container_name: nextcloud
    environment:
      - PUID=1000
      - PGID=1000
      - TZ=Europe/London
    volumes:
      - ./nextcloud/appdata:/config
      - ./nextcloud/data:/data
    restart: unless-stopped

  homeassistant:
    image: lscr.io/linuxserver/homeassistant:latest
    container_name: homeassistant
    environment:
      - PUID=1000
      - PGID=1000
      - TZ=Europe/London
    volumes:
      - ./hass/config:/config
    restart: unless-stopped

  jellyfin:
    image: lscr.io/linuxserver/jellyfin:latest
    container_name: jellyfin
    environment:
      - PUID=1000
      - PGID=1000
      - TZ=Europe/London
    volumes:
      - ./jellyfin/config:/config
      - ./jellyfin/tvshows:/data/tvshows
      - ./jellyfin/movies:/data/movies
    restart: unless-stopped
Here is where I thought I could also add the PiHole docker image. However if you plan on using PiHole as your network's DHCP server, it won't work. For all normal network connections required by applications running in a docker container you can just gain access to the isolated container's service ports by using port forwards in your container's runtime config - as shown above for ports 80, 81, and 443 above. However, DHCP protocol operates through a network 'broadcast' which cannot span multiple networks - in this case docker's bridge, and your LAN network. The easiest way round this is to use host networking which makes the container be on your LAN Network like a regular device. Thus allowing it to broadcast DHCP. It will have the same IP as your Docker host server in this mode however, which means we end up with port conflicts with NGINX Proxy Manager. There are other methods you could try detailed here. If you have any luck with them let me know.
To get round this I just spun up another Ubuntu server to run my PiHole image. more on that later.
Anyway, to get back to our proxy manager container, once the docker-compose.yml file is written, we can launch our compose stack with the following:
docker compose up -d
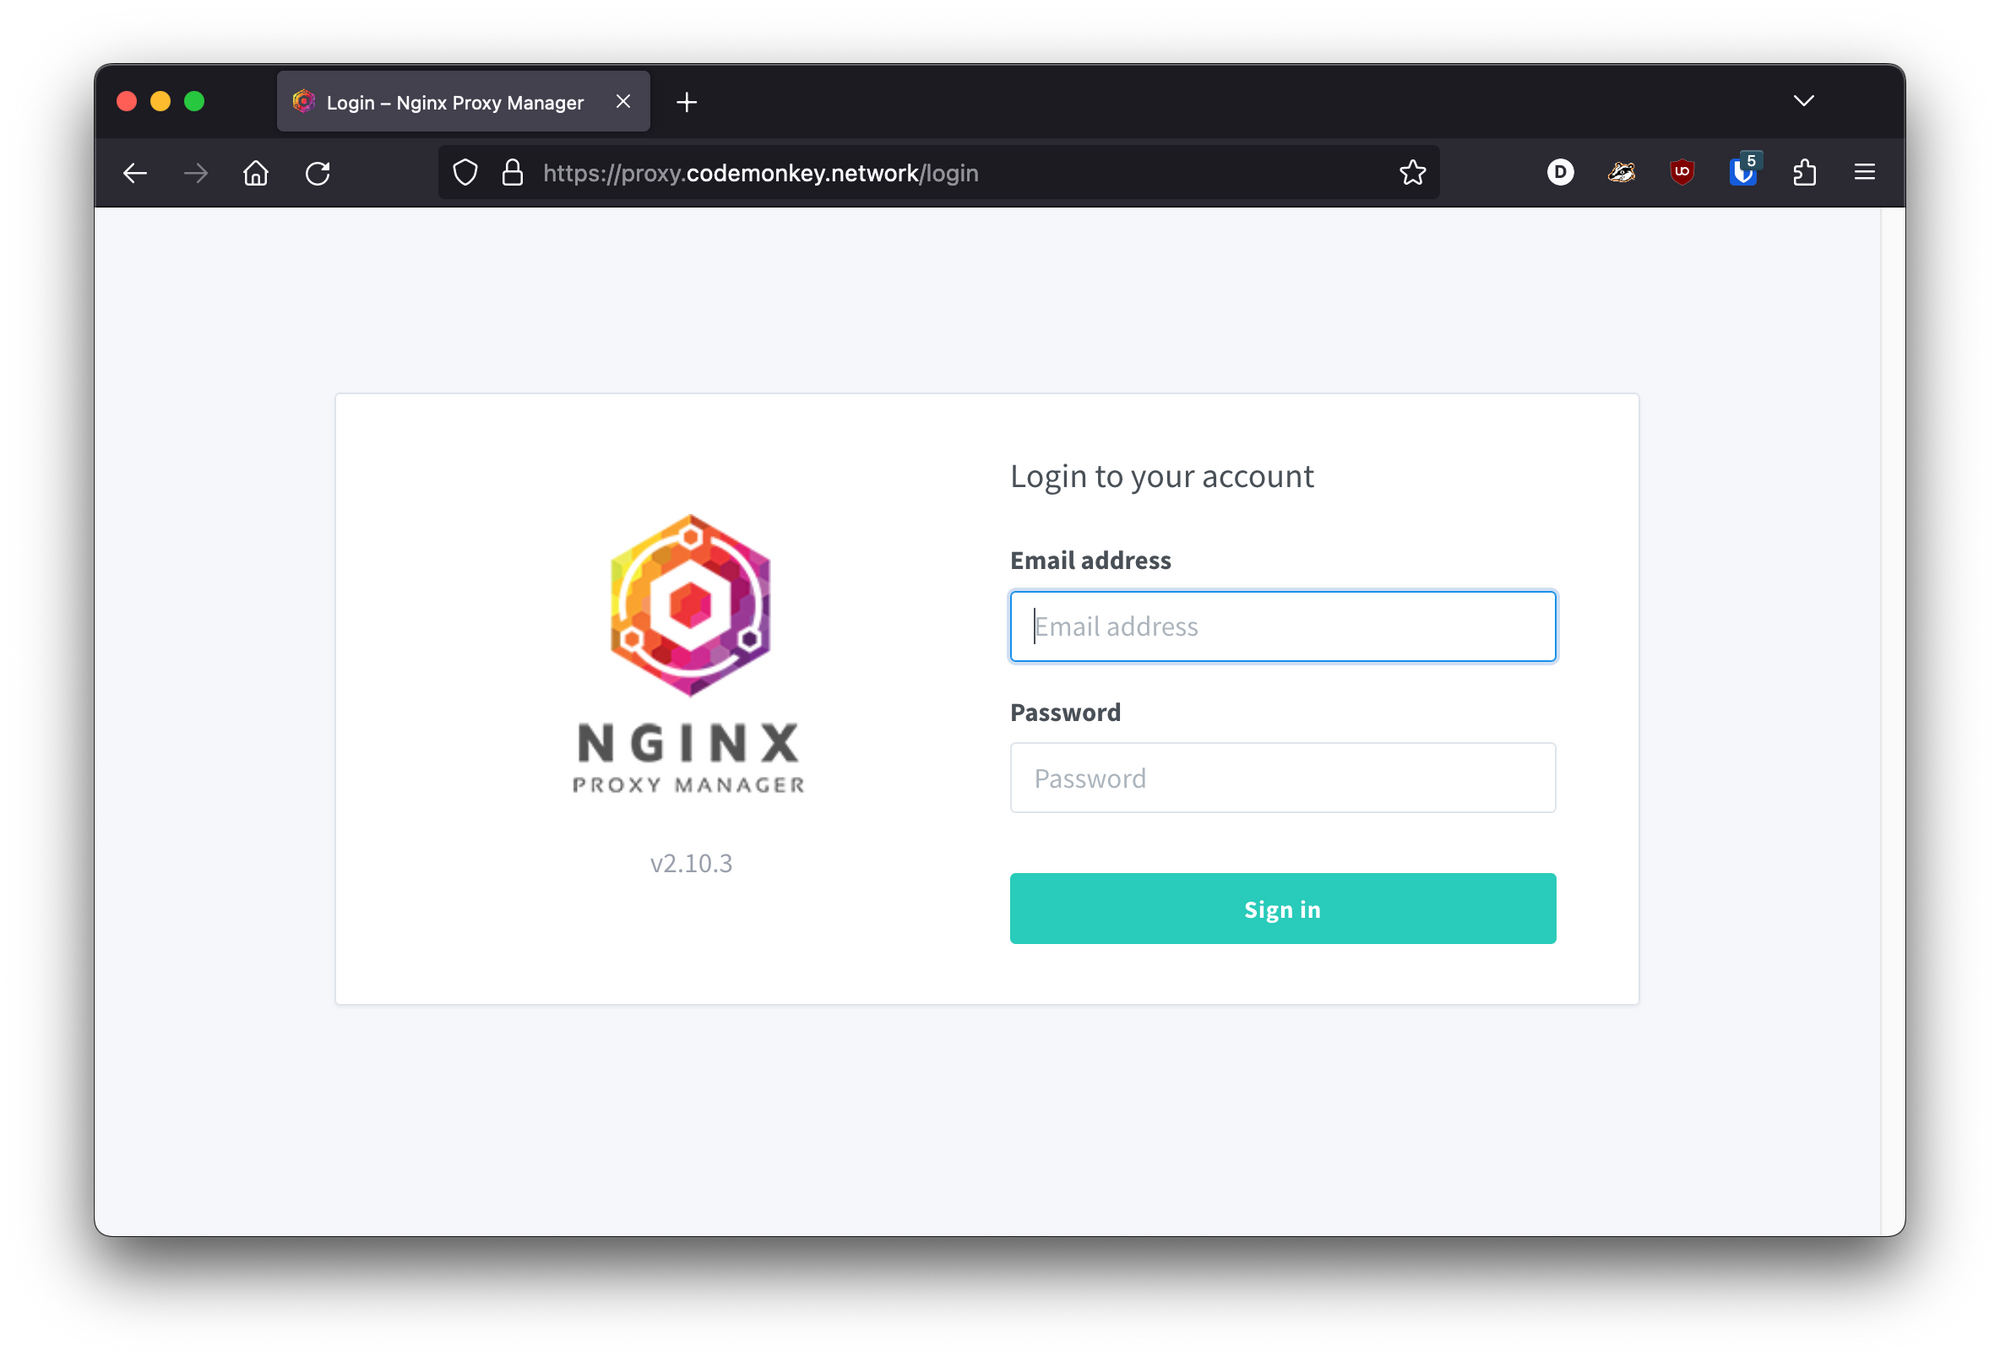
Once all the containers are all up and running, visit http://server-ip:81 in your browser.
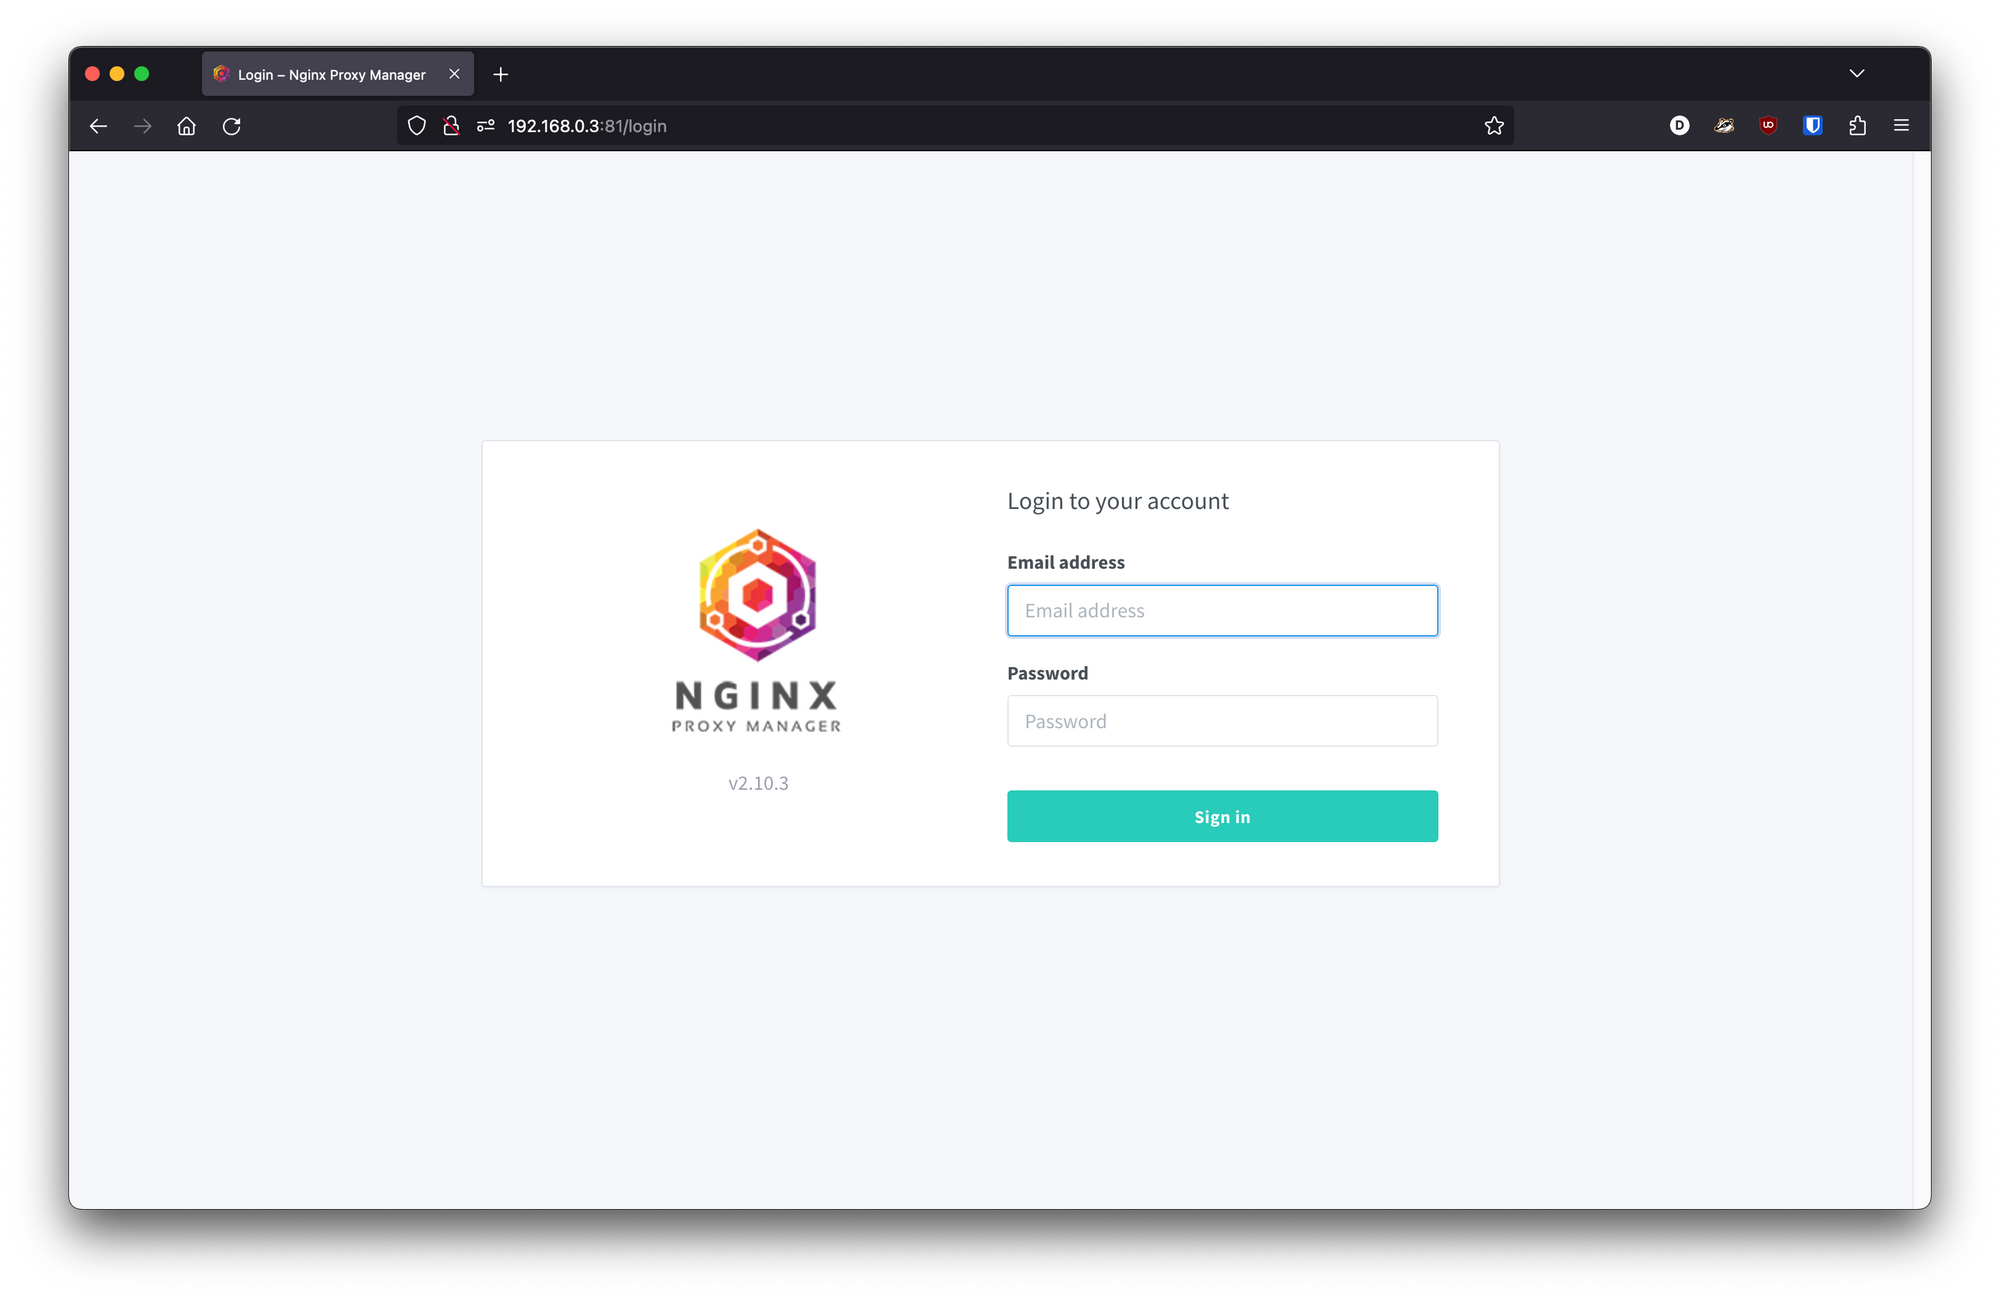
The default credentials are [email protected] and changeme. After your first login you will be asked to change them.
Issuing an SSL Wildcard Certificate
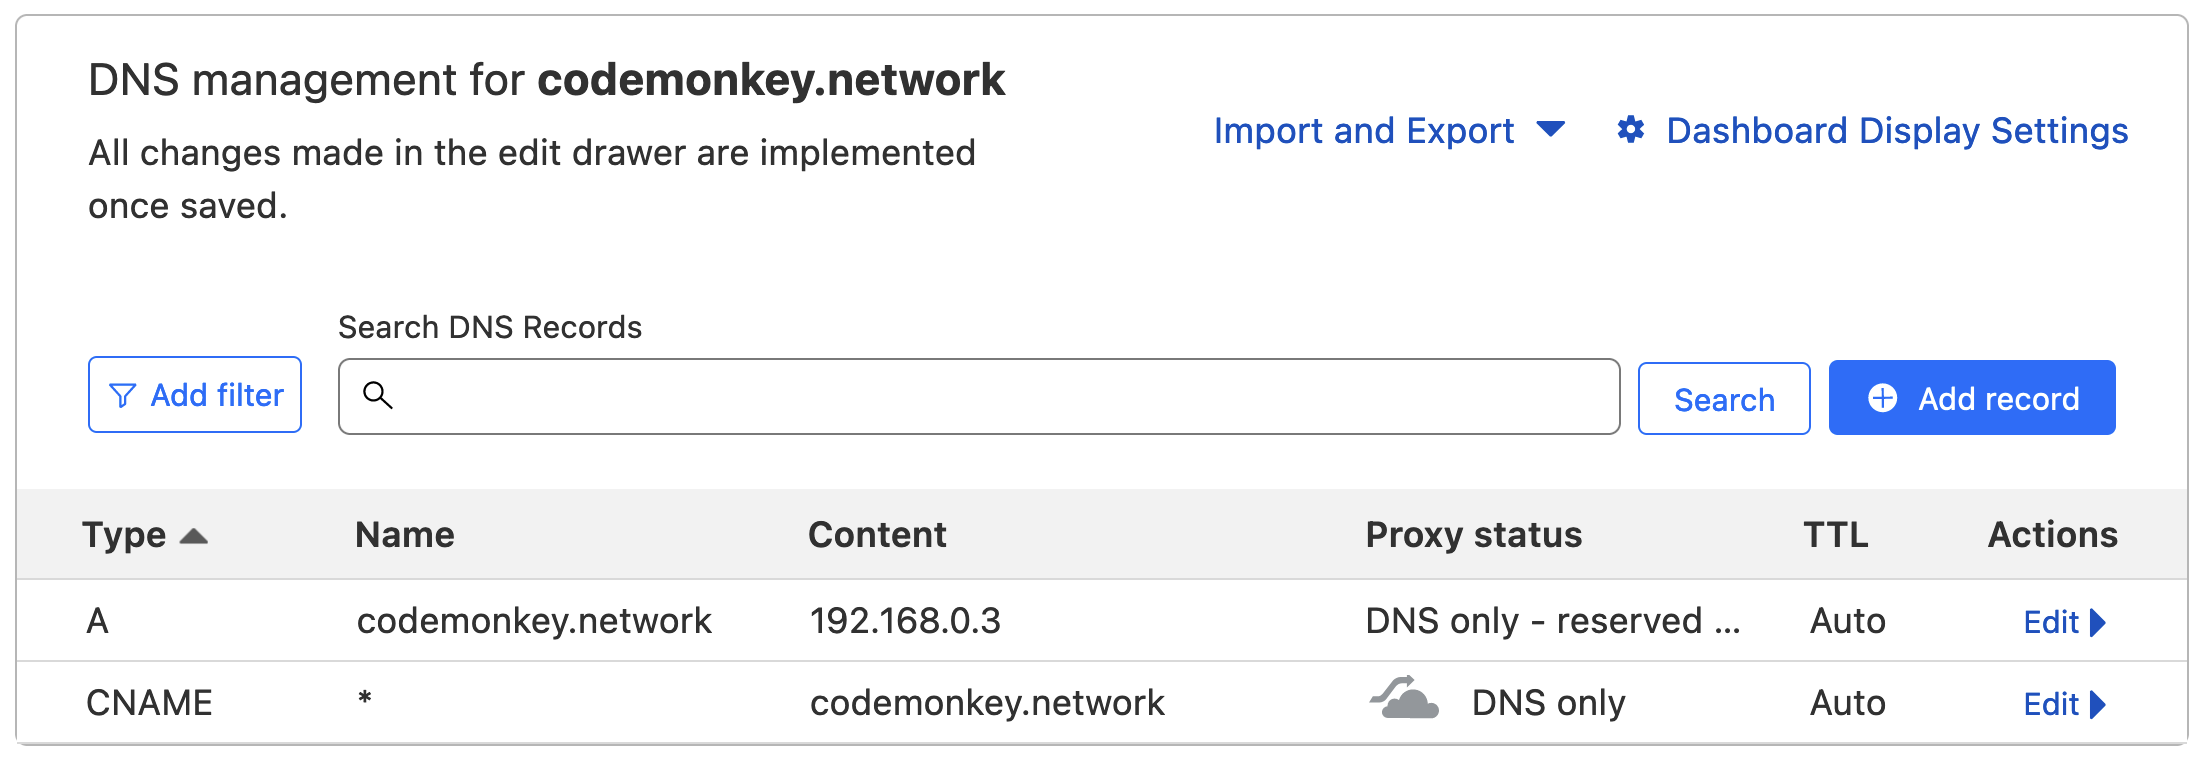
Now, before we can have NGINX proxy manager generate our SSL certificate, we need a domain and a few DNS records setting up.
As I am using a domain registered through Cloudflare I simply log in and browse to the DNS page. We need to add an A record that points to the internal IP address of our proxy manager, and then a CNAME record for the wildcard. Once done it should look like this:
We need one more thing from Cloudflare, and that is an API key to allow our Proxy Manager to manage the DNS records for the site. So go back to the site's overview page and click on "Get your API token". Then you want to click on "Create Token" and give it the permissions required to edit Zone DNS for your chosen domain. Make a note of the generated token and keep it safe.
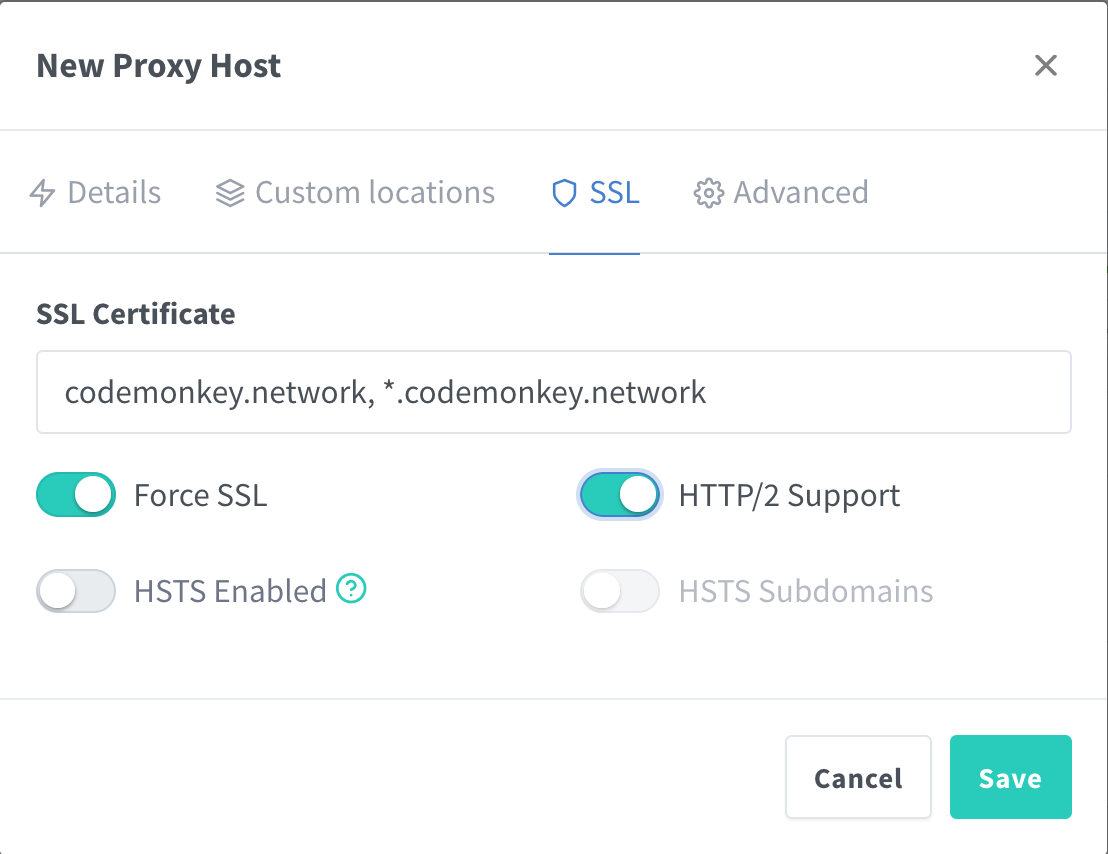
Now go back to your proxy manager's web UI and go to SSL Certificates, then click on "Add SSL Certificate". Now enter your domain name and the wildcard record for your domain; so in my case codemonkey.network and *.codemonkey.network. Then select "Use a DNS Challenge", select your provider, and then enter your API key in the "Credentials File Content" section. Finally, to avoid any issues with DNS propagation, enter a value of 120 into the "Propagation Seconds" field.
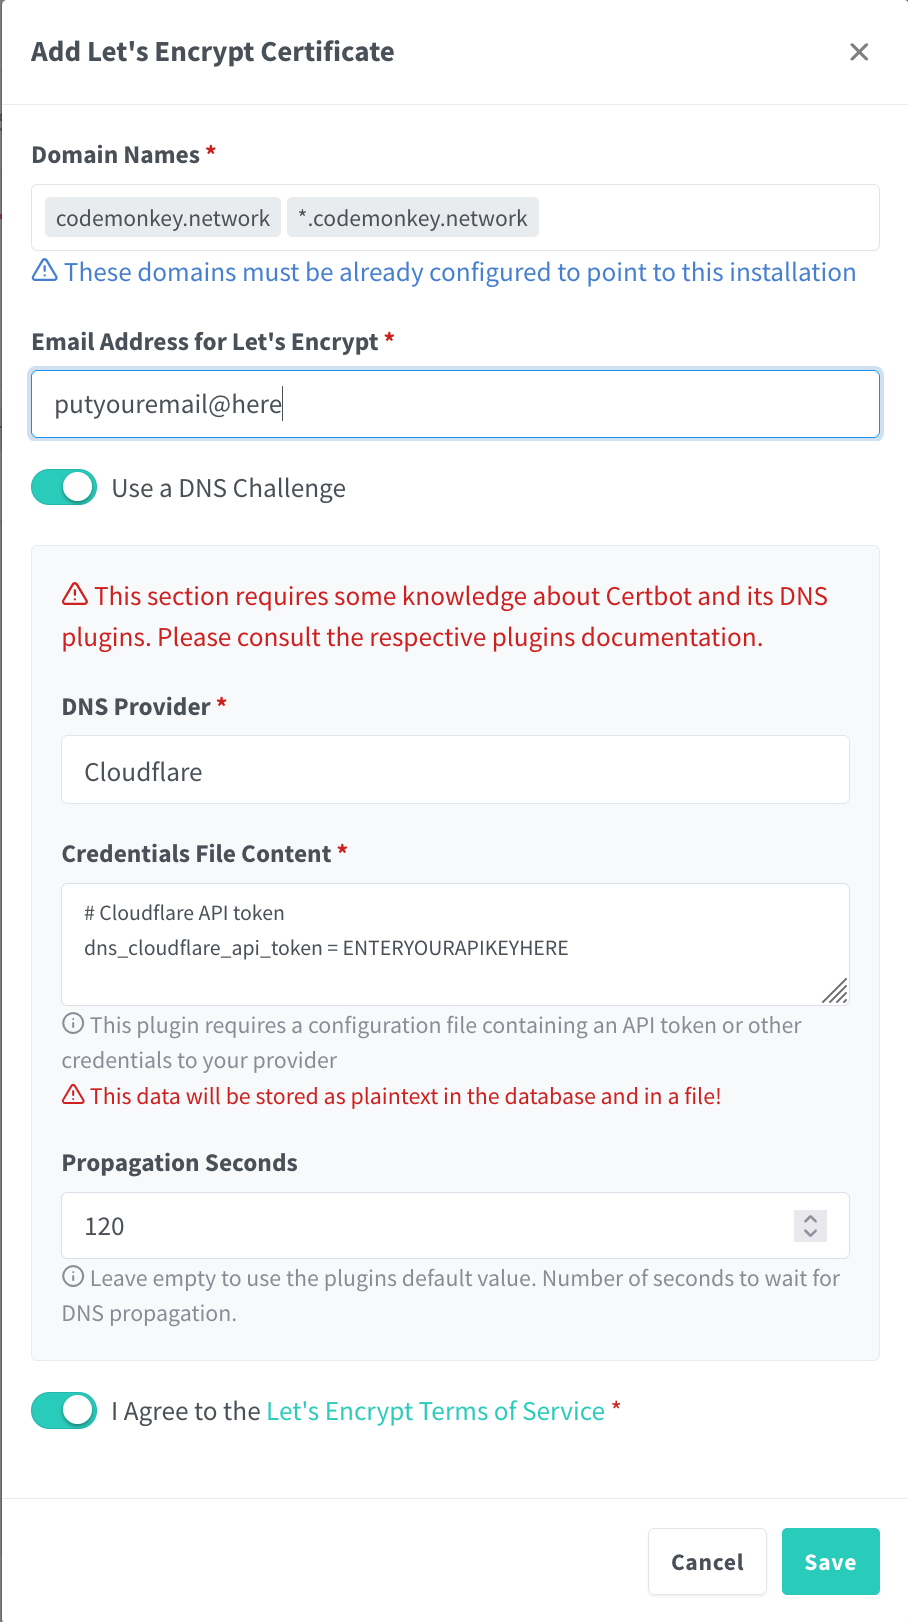
Agree to the Let's Encrypt Terms of Service and click "Save". Within 2 minutes you should have a shiny new SSL wildcard certificate.

Adding our first Proxy Entry
Our first proxy entry can be for the proxy manager itself. I decided to go with the highly original sub-domain name of proxy, so we will be able to type proxy.codemonkey.network into our browser and be presented with our proxy manager.
Along the top menu bar locate "Hosts", then click on "Proxy Hosts", and then click the button for "Add a Proxy Host".
Now fill in the details for the proxy entry:
- Domain Name:
proxy.codemonkey.network - Scheme:
http - Forward Hostname / IP:
nginxproxymanager - Forward Port:
81
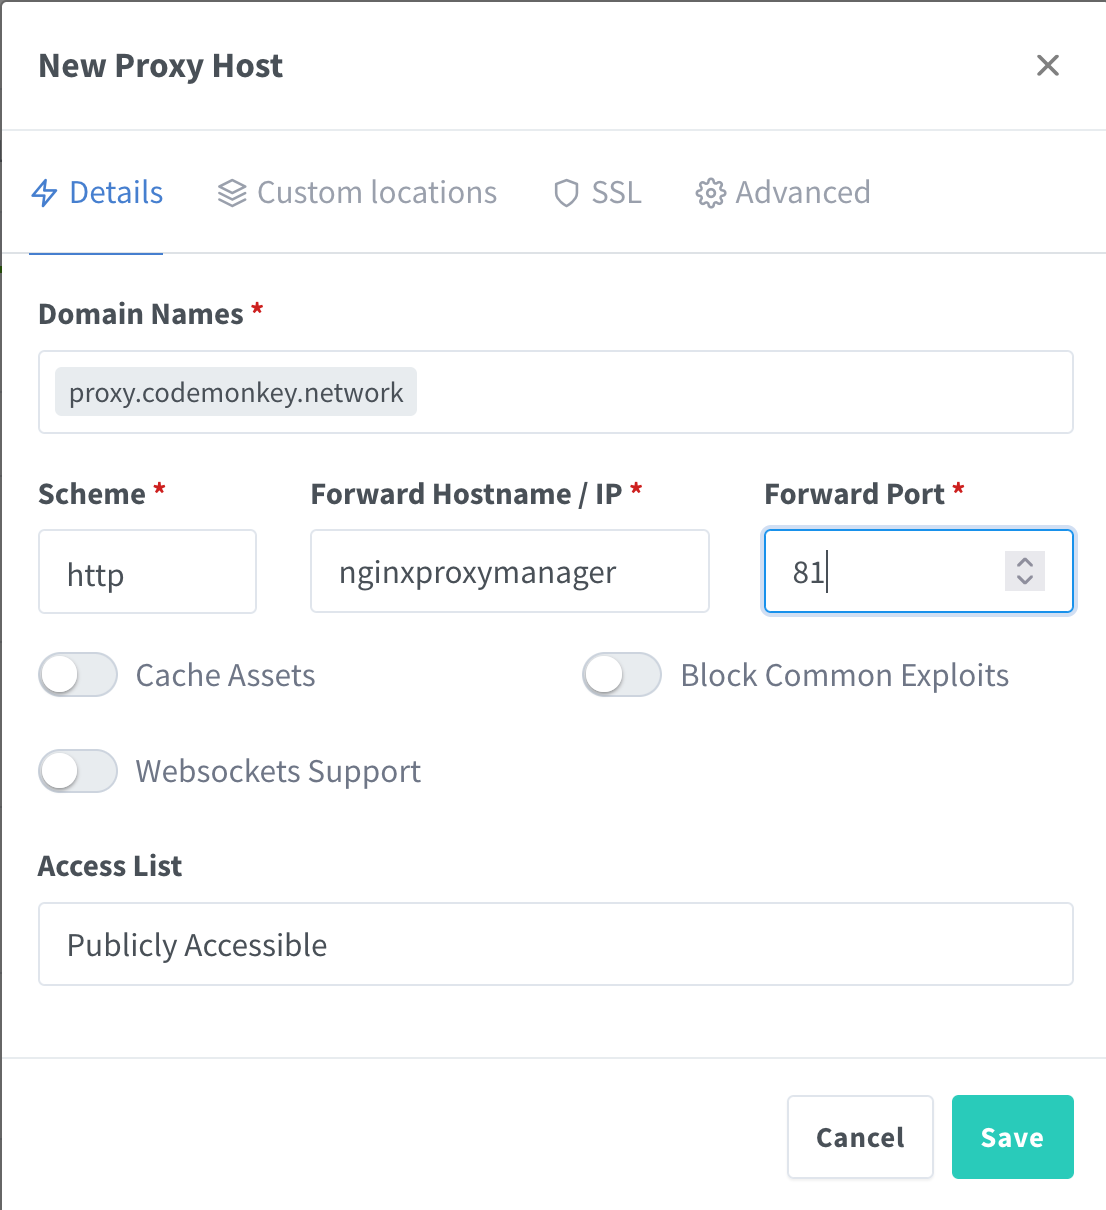
For the hostname we can use nginxproxymanager instead of its IP address as your applications are all in the same docker network. So you can simply use their respective container_name from the docker-compose.yml file.
Once these parameters have been entered, click on the SSL section near the top. Then select your SSL certificate from the dropdown menu, and then toggle "Force SSL" and "HTTP/2 Support". And finally, "Save".
And that's it! Now you can type proxy.codemonkey.network into your browser and be presented with the right internal website, with a lock icon and no annoying warning about an invalid certificate.
Now have fun going through and adding entries for every service and application you have on your network; jellyfin, nextcloud, any Synology NAS, etc.
Ad-blocking
Now back to the ad-blocking I mentioned. As we get port conflicts running it on the same VM as our proxy manager as we have to use host networking, I had decided to just have a second VM to run our PiHole. Additionally I also wanted to make my DNS queries over HTTPS to avoid any overly nosy ISPs.
So on our second VM I followed the same initial steps as above to install docker and docker-compose. Then I used the following docker-compose.yml file:
version: '3.5'
services:
  cloudflared:
    image: crazymax/cloudflared:latest
    container_name: cloudflared
    ports:
      - '5053:5053/udp'
    environment:
      - "TZ=Europe/London"
      - "TUNNEL_DNS_UPSTREAM=https://1.1.1.1/dns-query,https://1.0.0.1/dns-query"
    restart: unless-stopped
    networks:
      core-net:
        ipv4_address: 172.18.0.20

  pihole:
    container_name: pihole
    image: pihole/pihole:latest
    depends_on:
      - cloudflared
    network_mode: host
    environment:
      TZ: 'Europe/London'
      WEBPASSWORD: 'aLongAndVeryComplicatedPassword'
      DNS1: '172.18.0.20#5053'
      DNS2: 'no'
      # The below is only needed if you have an iPhone and don't want annoying messages in your email about not being able to load content privately
      FTLCONF_BLOCK_ICLOUD_PR: 'false'
    # Volumes store your data between container upgrades
    volumes:
      - './etc-pihole:/etc/pihole'
      - './etc-dnsmasq.d:/etc/dnsmasq.d'
    #   https://github.com/pi-hole/docker-pi-hole#note-on-capabilities
    cap_add:
      - NET_ADMIN # Required if you are using Pi-hole as your DHCP server, else not needed
      - NET_BIND_SERVICE
    restart: unless-stopped

networks:
  core-net:
    ipam:
      driver: default
      config:
        - subnet: '172.18.0.0/24'
A quick docker compose up -d later and we have PiHole up and running with a cloudflared tunnel to run all our DNS queries over privately.
For convenience I then add a proxy entry for the pihole into our proxy manager, so I can get to the admin console by typing in pihole.codemonkey.network into my browser. Nice and easy.
Log into the PiHole admin panel, click "Settings", "DHCP", and then fill in the DHCP settings you need before ticking the box to enable the server and clicking "Save".
Just remember to disable any other DHCP servers you may have on your network such as from your Router.
And that's it. All done. We now have valid SSL certificates for all our internal services and applications, with ad-blocking and DNS over HTTPS.
Credit for most of this setup has to go to Wolfgang, so go check out his channel and show his videos some love.